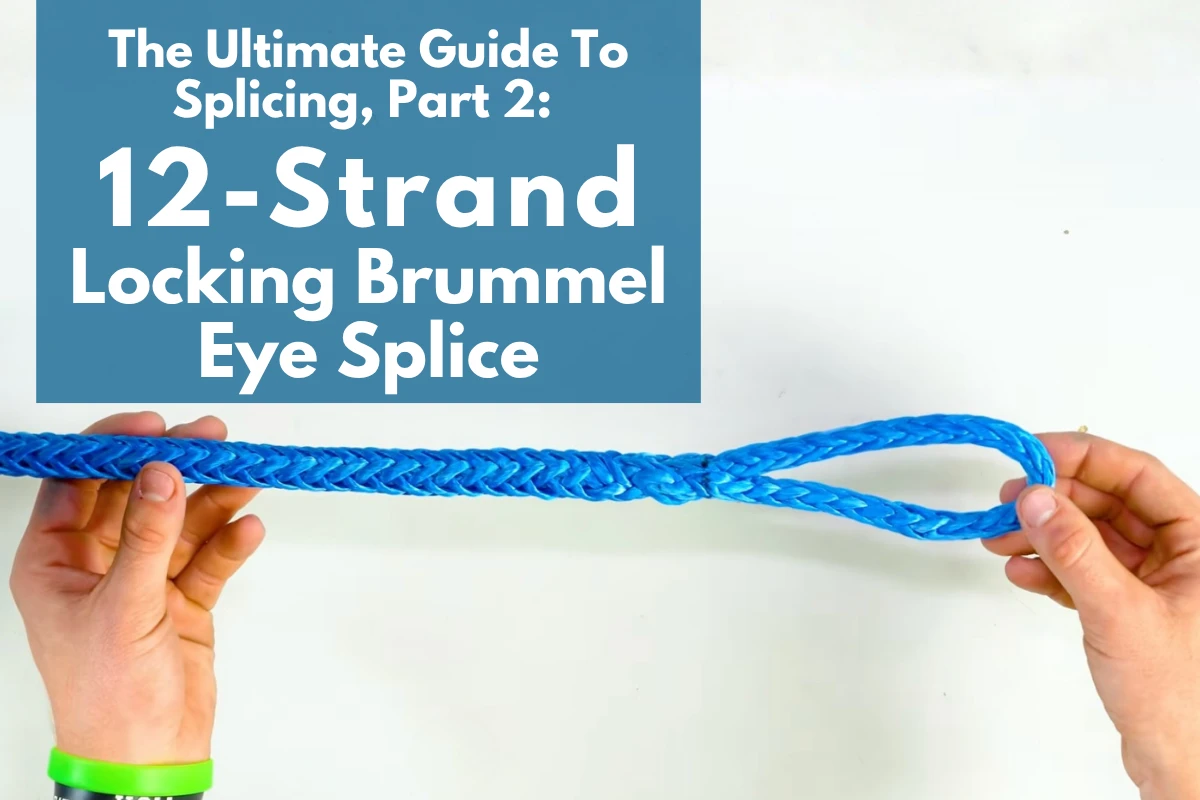
The Ultimate Guide To Splicing, Part 2: 12-Strand Locking Brummel Eye Splice
Estimated 0 min read
In Part 1 of our Ultimate Guide to Splicing, we covered the double braid eye splice, one of the most useful splices for double braid polyester, marine lines, sailing rope, and plenty of other everyday applications.
This time, we are moving over to a completely different rope construction: 12-strand hollow braid.
More specifically, we are going to show you how to make a 12-strand locking Brummel eye splice.
If you work with HMPE, UHMWPE, Dyneema-style rope, synthetic winch line, high-strength pulling rope, or other spliceable 12-strand hollow braid, this is a splice worth knowing. It creates a permanent eye without needing knots or bulky hardware, and once you understand how the rope passes through itself, the process is surprisingly straightforward.
It can look a little strange the first time you do it. At one point you are passing an entire eye through the middle of the rope and turning part of the braid inside out. That is normal. Trust the process.
As with any rope splice, the most important thing is using the correct splice for the exact rope in your hands. Not every 12-strand rope is constructed the same way or intended to be spliced. The 12-strand HMPE rope available from RightRope.com is a hollow-braid construction that is easily spliceable, extremely strong, lightweight, and very low stretch.
And, as always, if you need the finished product more than you need another Saturday afternoon project, we can splice the rope for you when you order from RightRope.com.
What Is a Locking Brummel Eye Splice?
A locking Brummel eye splice creates a permanent loop in the end of a hollow-braid rope.
Instead of tying a knot, the rope is passed through itself in a specific pattern that creates a mechanical lock. The remaining tail is then buried down the hollow center of the rope and tapered so the finished splice transitions smoothly back into the standing part of the line.
When finished correctly, there is no big knot hanging off the end, no loose tail flopping around, and no bulky connection unnecessarily getting in the way.
For our splicing method, we use the locking Brummel eye splice on rope diameters of 5/8 inch and smaller. For diameters of 3/4 inch and above, we use a long-bury splice instead.
It is important to make that distinction. Rope splicing is not a matter of learning one technique and using it on anything vaguely rope-shaped. Rope diameter, material, braid construction, application, and manufacturer recommendations all matter.
What Is a 12-Strand Locking Brummel Splice Used For?
One of the most common applications for this type of splice is 12-strand HMPE rope.
HMPE stands for High-Modulus Polyethylene. UHMWPE stands for Ultra High Molecular Weight Polyethylene. You will also hear names such as Dyneema and Spectra thrown around when talking about this category of high-performance fiber.
The big attraction to HMPE is strength without much weight or stretch. RightRope's 12-strand UHMWPE/HMPE rope is stronger than steel wire rope of equal size, lightweight enough to float, abrasion resistant, and extremely low stretch. It is commonly used for winch lines, pulling ropes, lifting slings, towing, rigging, and other jobs where strength-to-weight ratio matters.
That makes an eye splice especially useful.
A properly made eye gives you a clean connection point for suitable hooks, shackles, thimbles, rigging hardware, and other equipment. On a winch line, for example, a spliced eye gives you a much cleaner termination than tying a knot in a rope that was never meant to be used that way. Knots also reduce the breaking strength of a rope, because they do not effectively distribute force.
One important warning here: high-strength rope deserves high-strength thinking. Never assume that because the rope has a massive breaking strength, every eye splice, piece of hardware, attachment point, or application automatically has that same capacity. The entire system needs to be properly sized for the load and application.
Before we dive in, you may find it easier to follow along with a video than a text tutorial with images, so here’s a link to our relevant youtube video.
How to Make a 12-Strand Locking Brummel Eye Splice
Tools Needed For Your 12-Strand Locking Brummel Eye Splice
- Several sizes of fids
- Tape
- Permanent marker
- Sharp scissors (kevlar shears)
The tool setup for this splice is pretty simple.
You will need several sizes of fids (including one about twice the diameter of your rope), tape, a permanent marker, and sharp scissors. HMPE rope can be difficult to cut, so Kevlar shears or other scissors designed for high-performance fiber may be needed.
Remember, if you would rather watch the entire process while following along you can use our 12-Strand Locking Brummel Eye Splice video along with these instructions.
Now let's get into it.
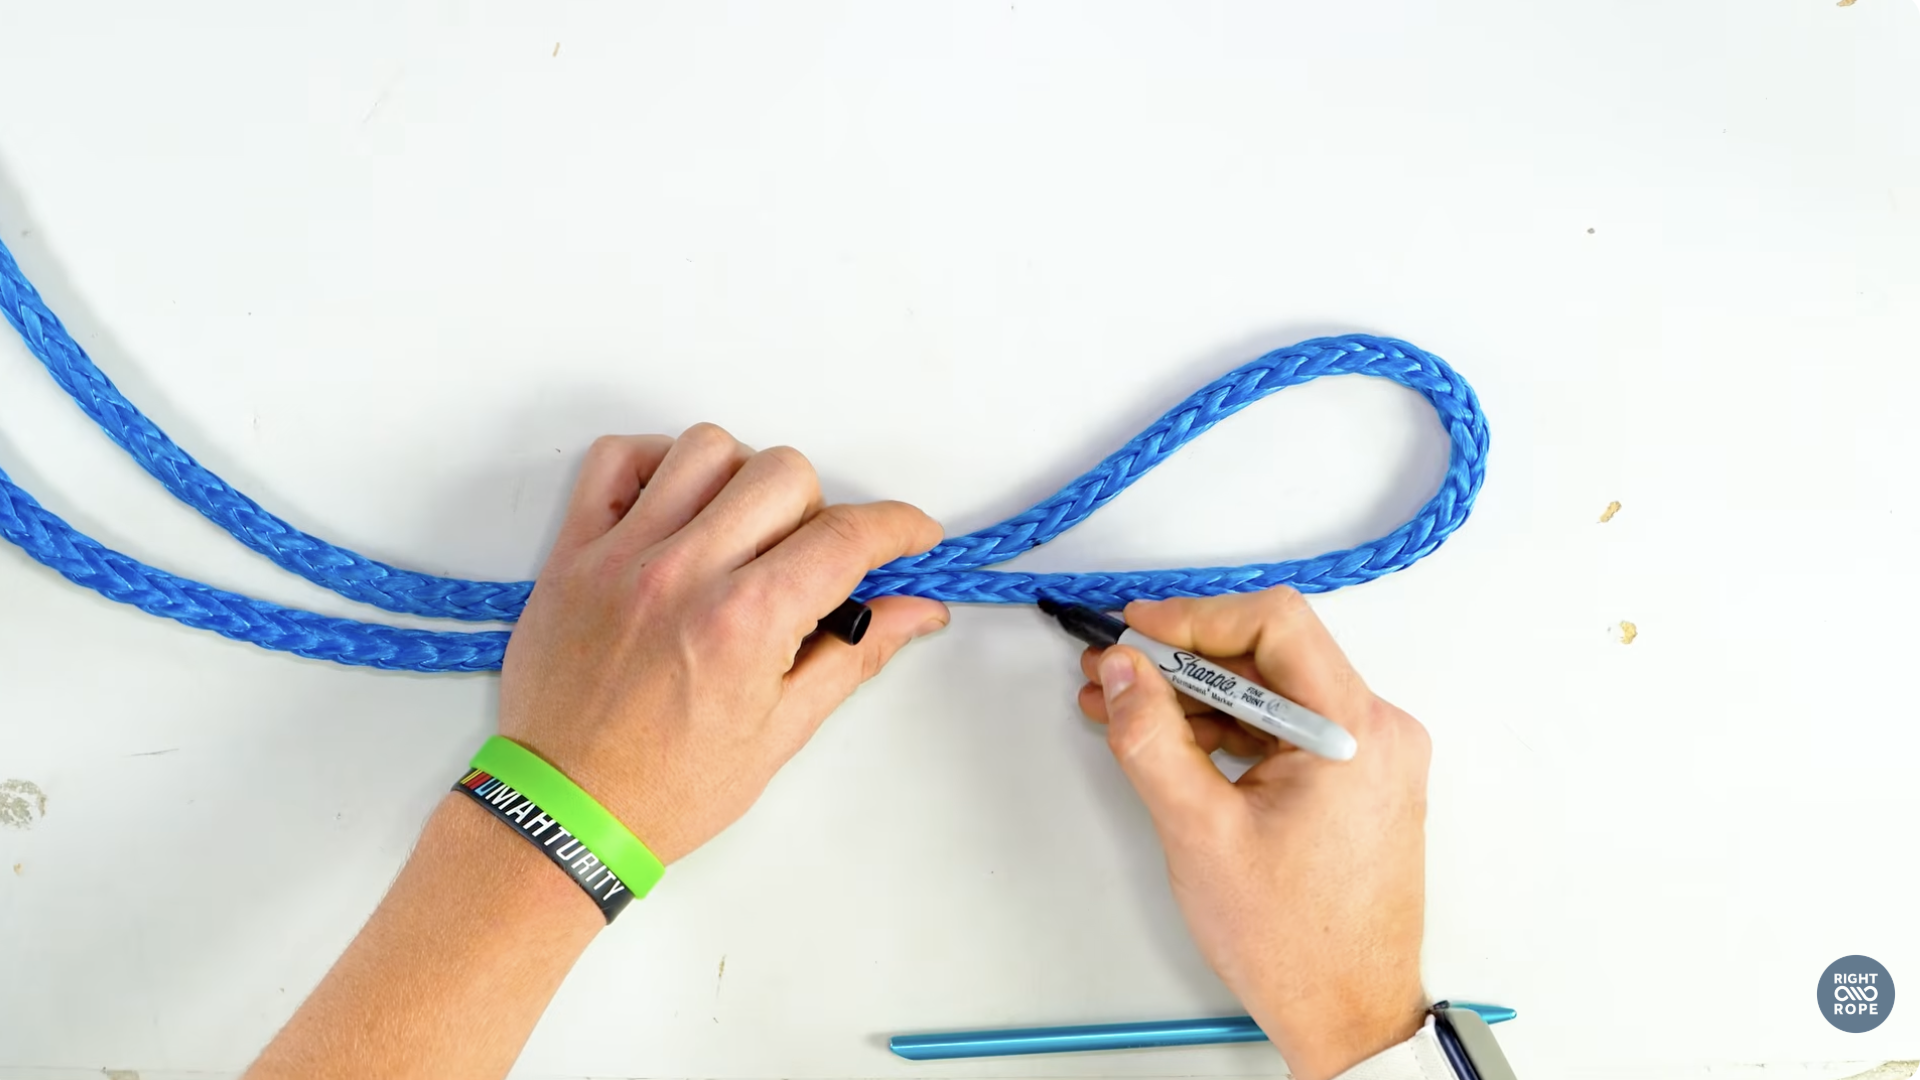
Mark Your 12-Strand Rope
Start with the properly sized fid for your rope. In our video, we are splicing 3/8-inch rope.
From the end of the rope, measure two full fid lengths and make your first mark. We will call this Mark 1.
Next, form the eye to whatever finished size you need. Once you have the eye positioned where you want it, make Mark 2, opposite Mark 1.
From Mark 2, measure another three fid lengths down the standing part of the rope and make Mark 3.
You now have the basic layout for your locking Brummel.
Pass the Tail Through the Rope at Mark 2
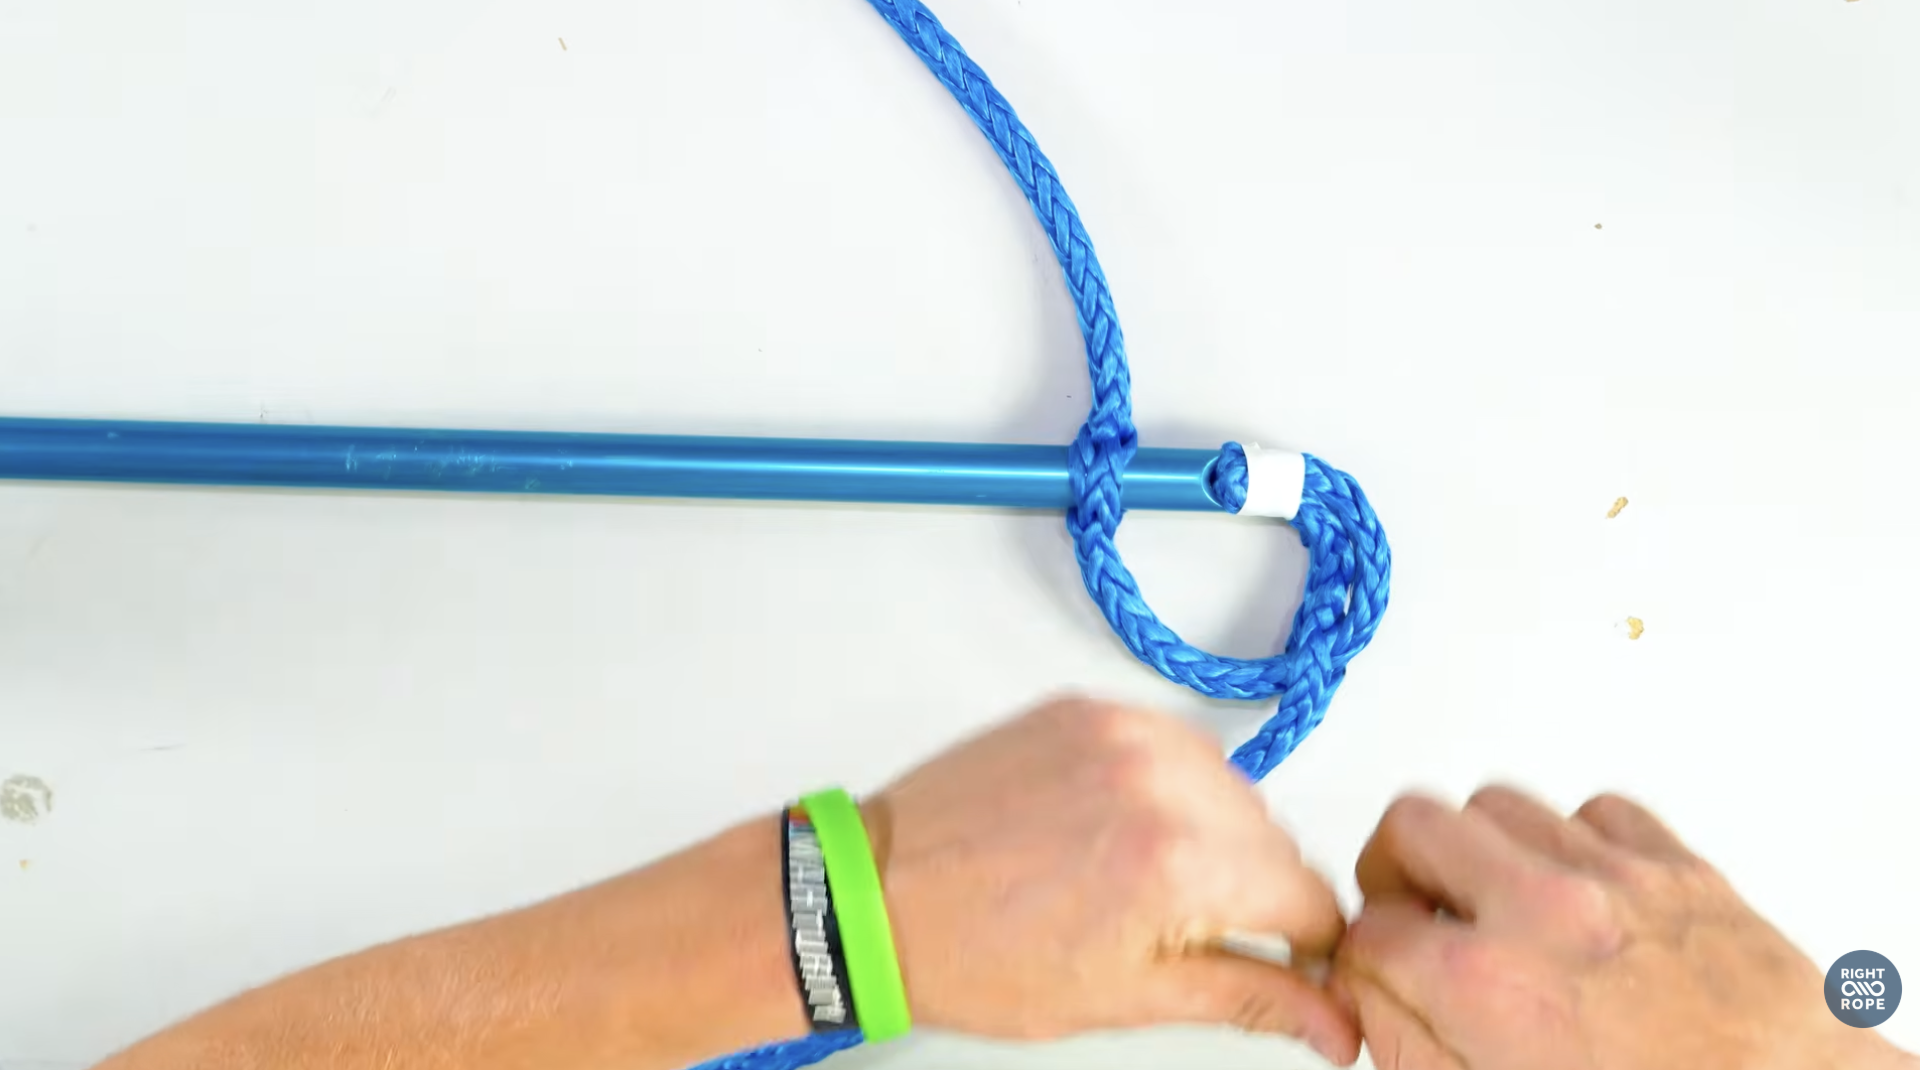
Using a fid, open the rope precisely in the middle of Mark 2 with six strands on either side of the fid. You’re going to pass the end of the rope through this hole, but first you may need to expand it with bigger fid sizes.
When the hole is big enough, tape the end to the fid and pass it through.
Pull the tail through until Mark 1 has been pulled through the hole.
Open the rope again at Mark 1, then pass the entire eye through that opening. Again, be sure to open the middle of the rope with 6 strands on either side of the fid. You will need to work up to a larger size fid to be able to pull the eye through.
When you are ready, carefully bend the eye around to tape onto the fid and pull it through. Once the eye has been pulled completely through, you have created the basic lock.
Remove the Twist
You may notice that your rope is now twisted. Do not try to simply wrench everything into position. There is a specific way to remove the twist and get the braid lying correctly again.
You’re going to take the tag end and pass it back underneath itself, working from the bottom toward the eye. Use your fid to get between the rope and open it enough to pass the end through.
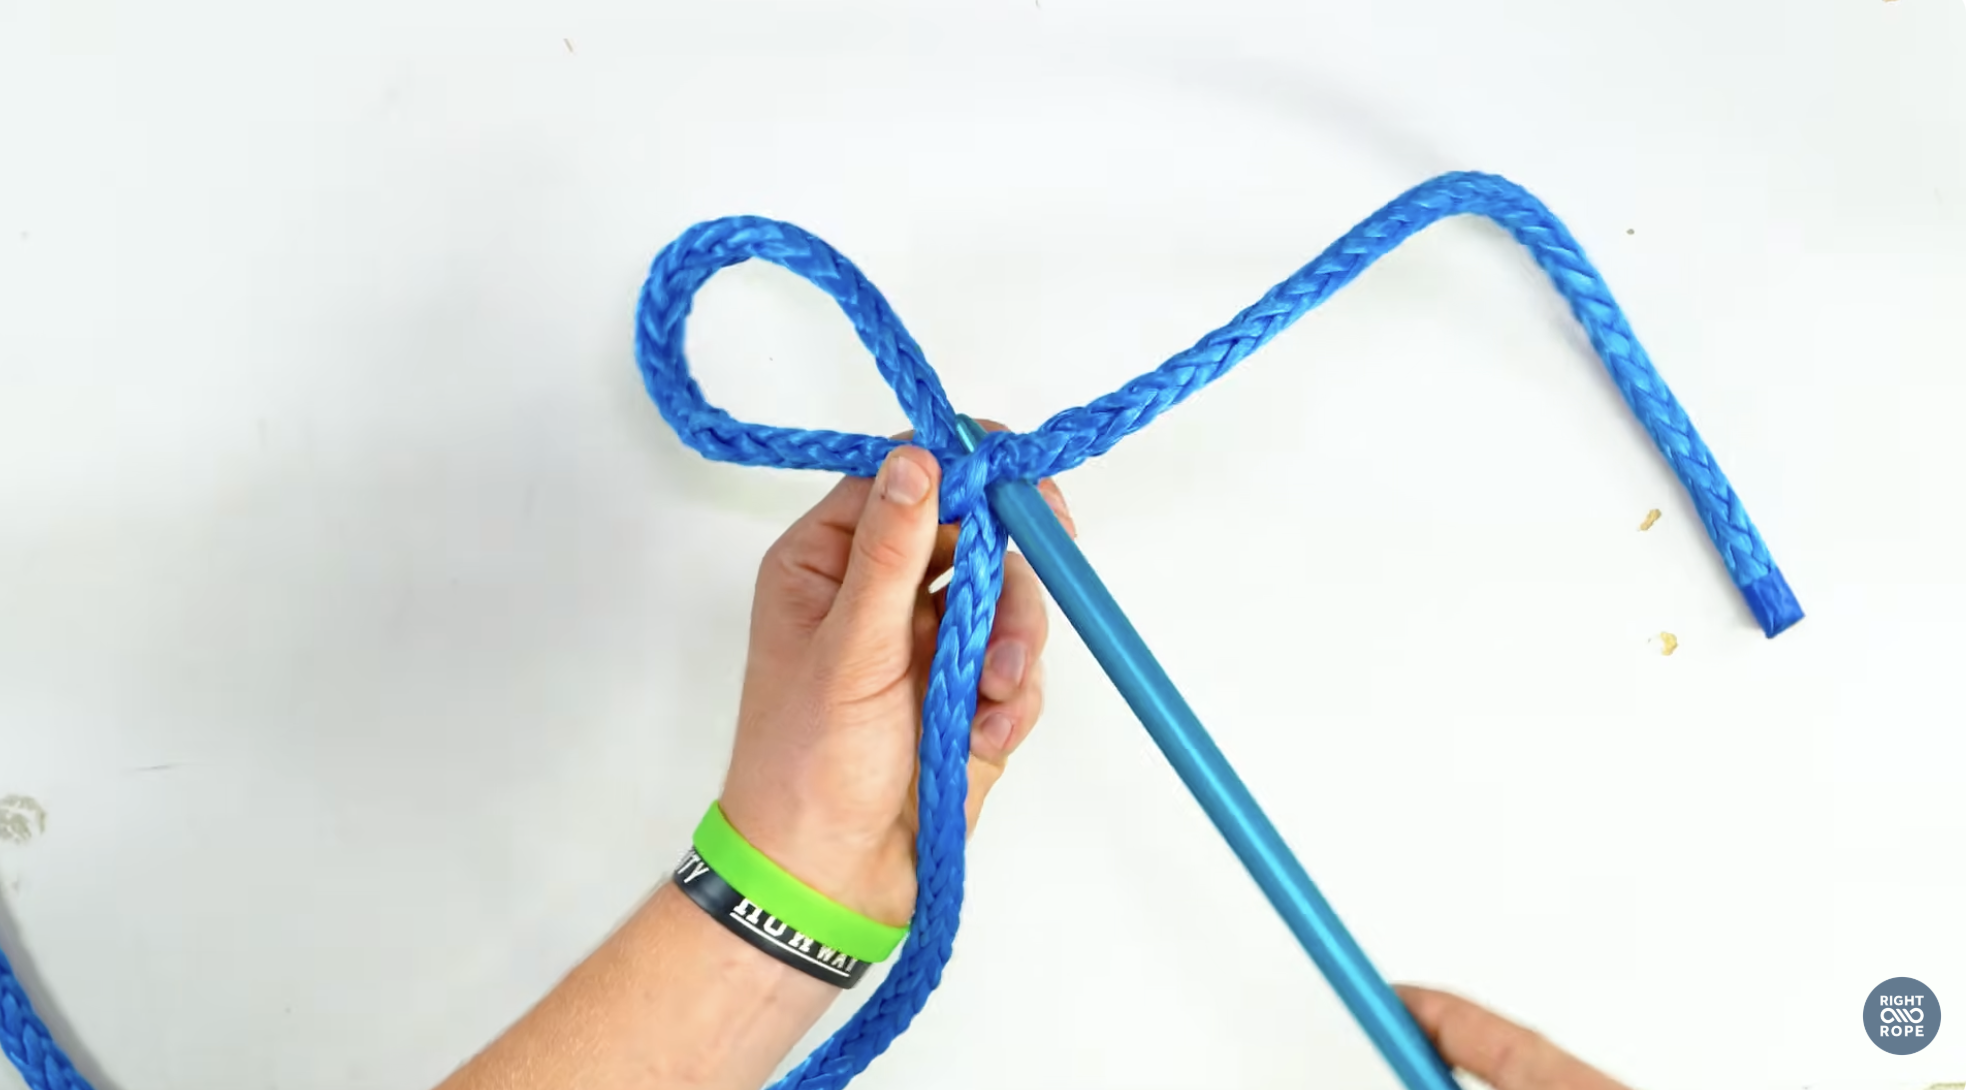
Once the tail has been pulled through, the twist should disappear.
Take a second here to straighten everything out. Make sure your strands are lying properly and the locking portion of the eye looks clean.
Now you should have a clearly formed eye with the locking Brummel holding it in place. The hard-looking part is done.
Bury the Tail Inside the Rope
The locking section forms the eye, but we are not going to leave that long tag end hanging out. One nice thing about a 12-strand hollow braid is exactly what the name suggests: it has a hollow center. We are going to use that hollow center to bury the tail inside the standing rope.
At the base of the lock, open up the braid and insert your fid into the center of the rope.
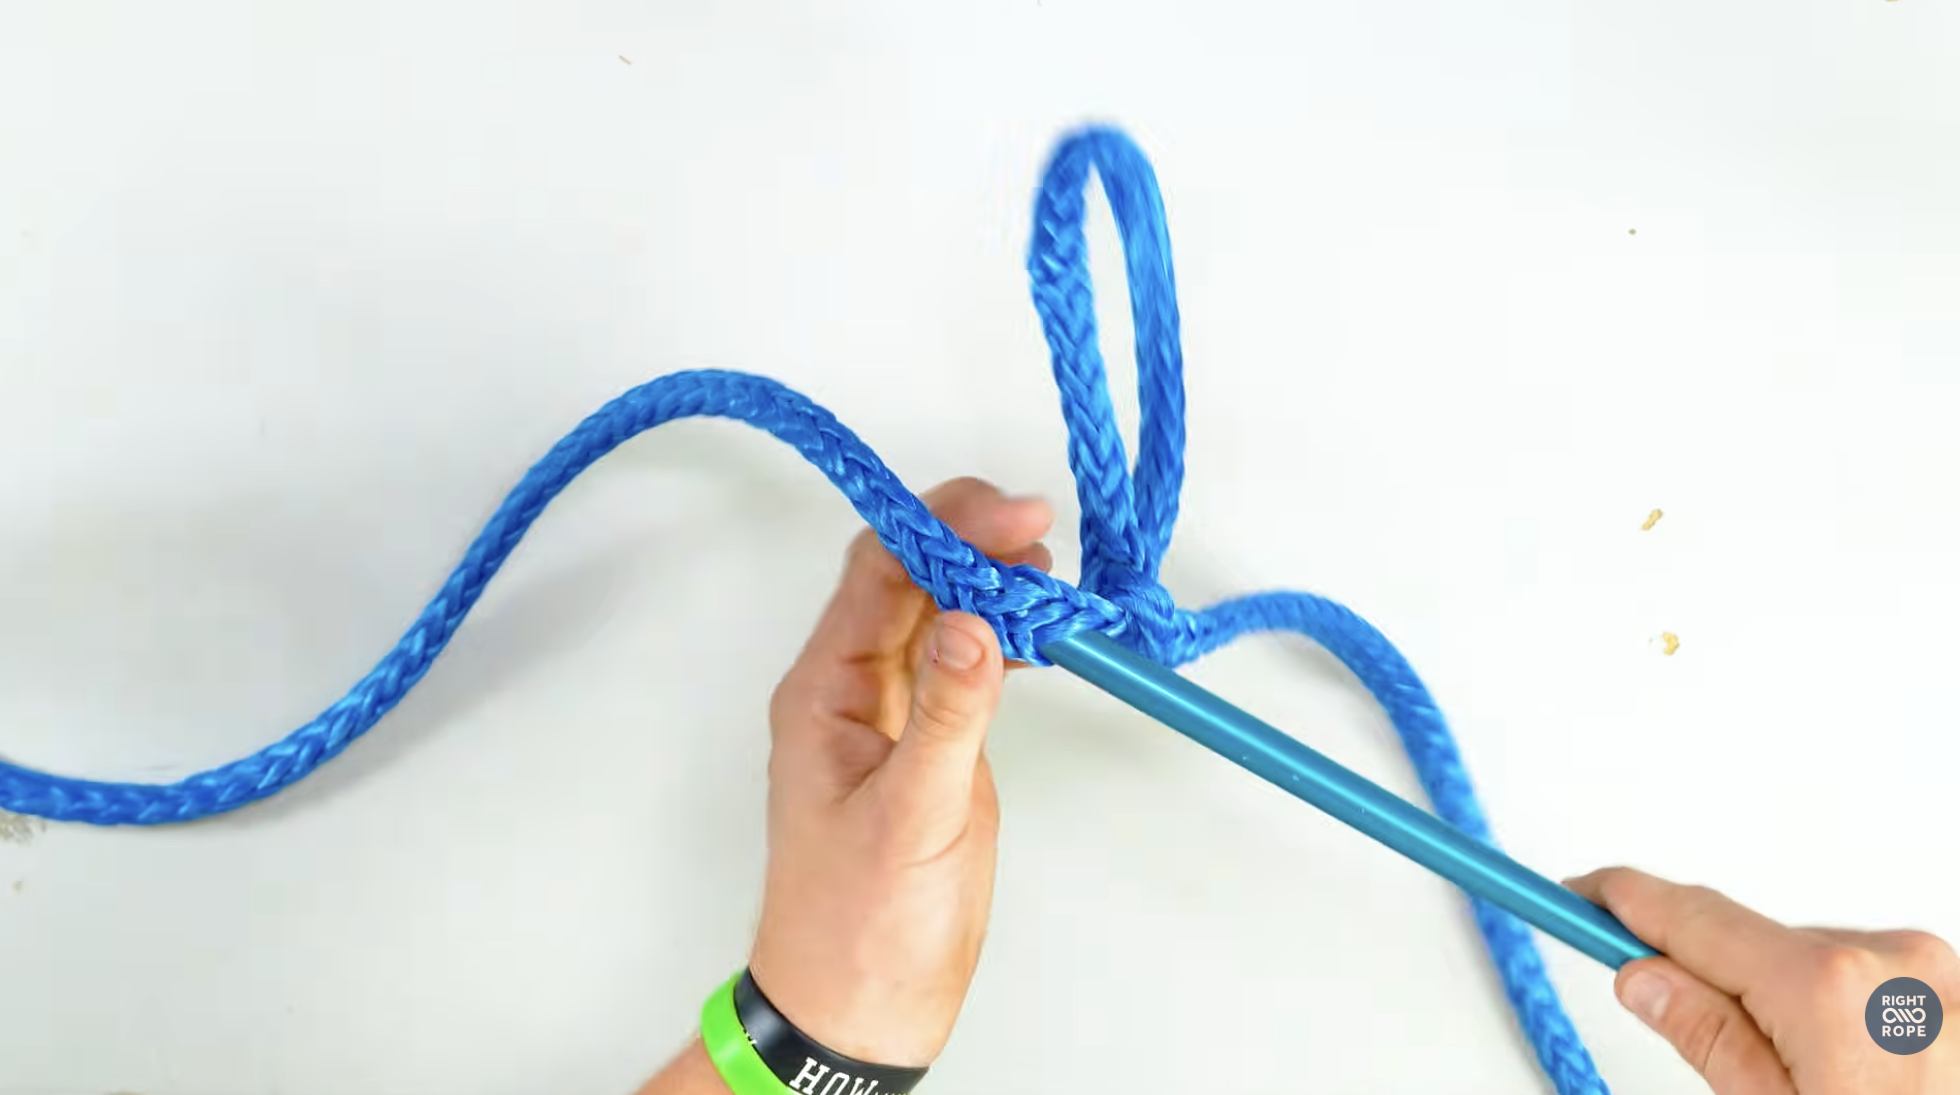
Work the fid down through the hollow braid until you reach Mark 3. Attach the tag end to the fid and pull it all the way through.
It helps to bunch or scrunch the outer braid back toward the eye as you are working. This gives you some room to pull the tail through before you eventually milk everything back into position.
Once the tail has been pulled through at Mark 3, remove the tape from the end. Do not milk the tail completely inside yet. We have one more important job to do.
Taper the Tail
A good rope splice should not go from full rope thickness to nothing all at once. That creates an abrupt change in diameter and leaves an ugly lump in the rope.
Instead, we taper the tail.
Using your marker, count three strand pairs in from the end and mark a pair of V-shaped strands. Skip the next pair and mark another pair. Skip another and mark one more pair, making sure you are selecting strands that rotate in the opposite directions as shown in this image.
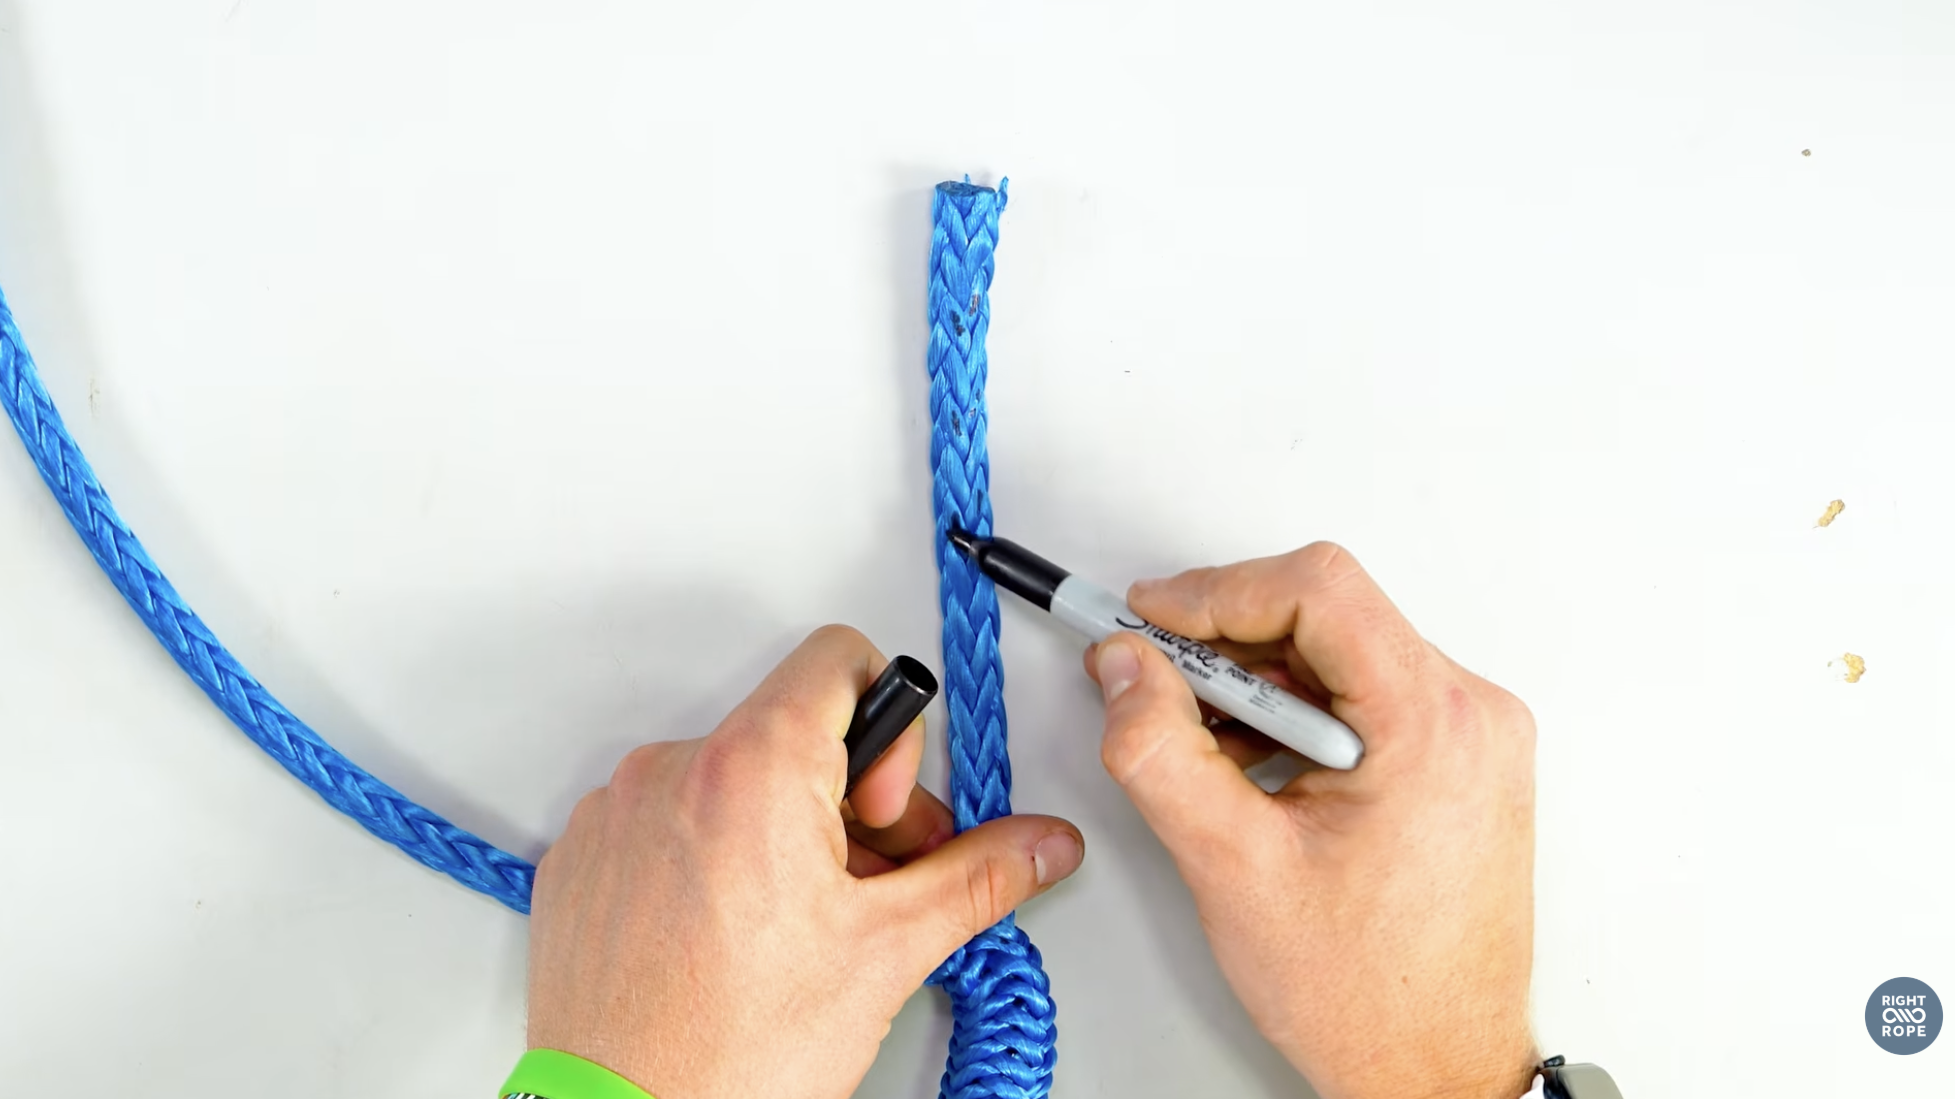
Use a fid if needed to pull the strands out, then cut and remove those marked strands.
What you are doing is progressively reducing the amount of material in the tail so it gets thinner toward the end.
Especially with HMPE, use the right scissors and make deliberate cuts. This is where you’ll really appreciate those kevlar scissors. A clean taper makes the final bury much easier.
Milk the Tail Back Inside
Once the tail has been tapered, you are almost finished. Grab the standing part of the rope and begin milking the outer braid back toward the eye. As the braid straightens, the tapered section gets pulled back inside the hollow center.
Keep working the braid until the entire tail disappears. That gradual taper should allow the rope to transition smoothly instead of leaving a hard bump where the buried tail ends.
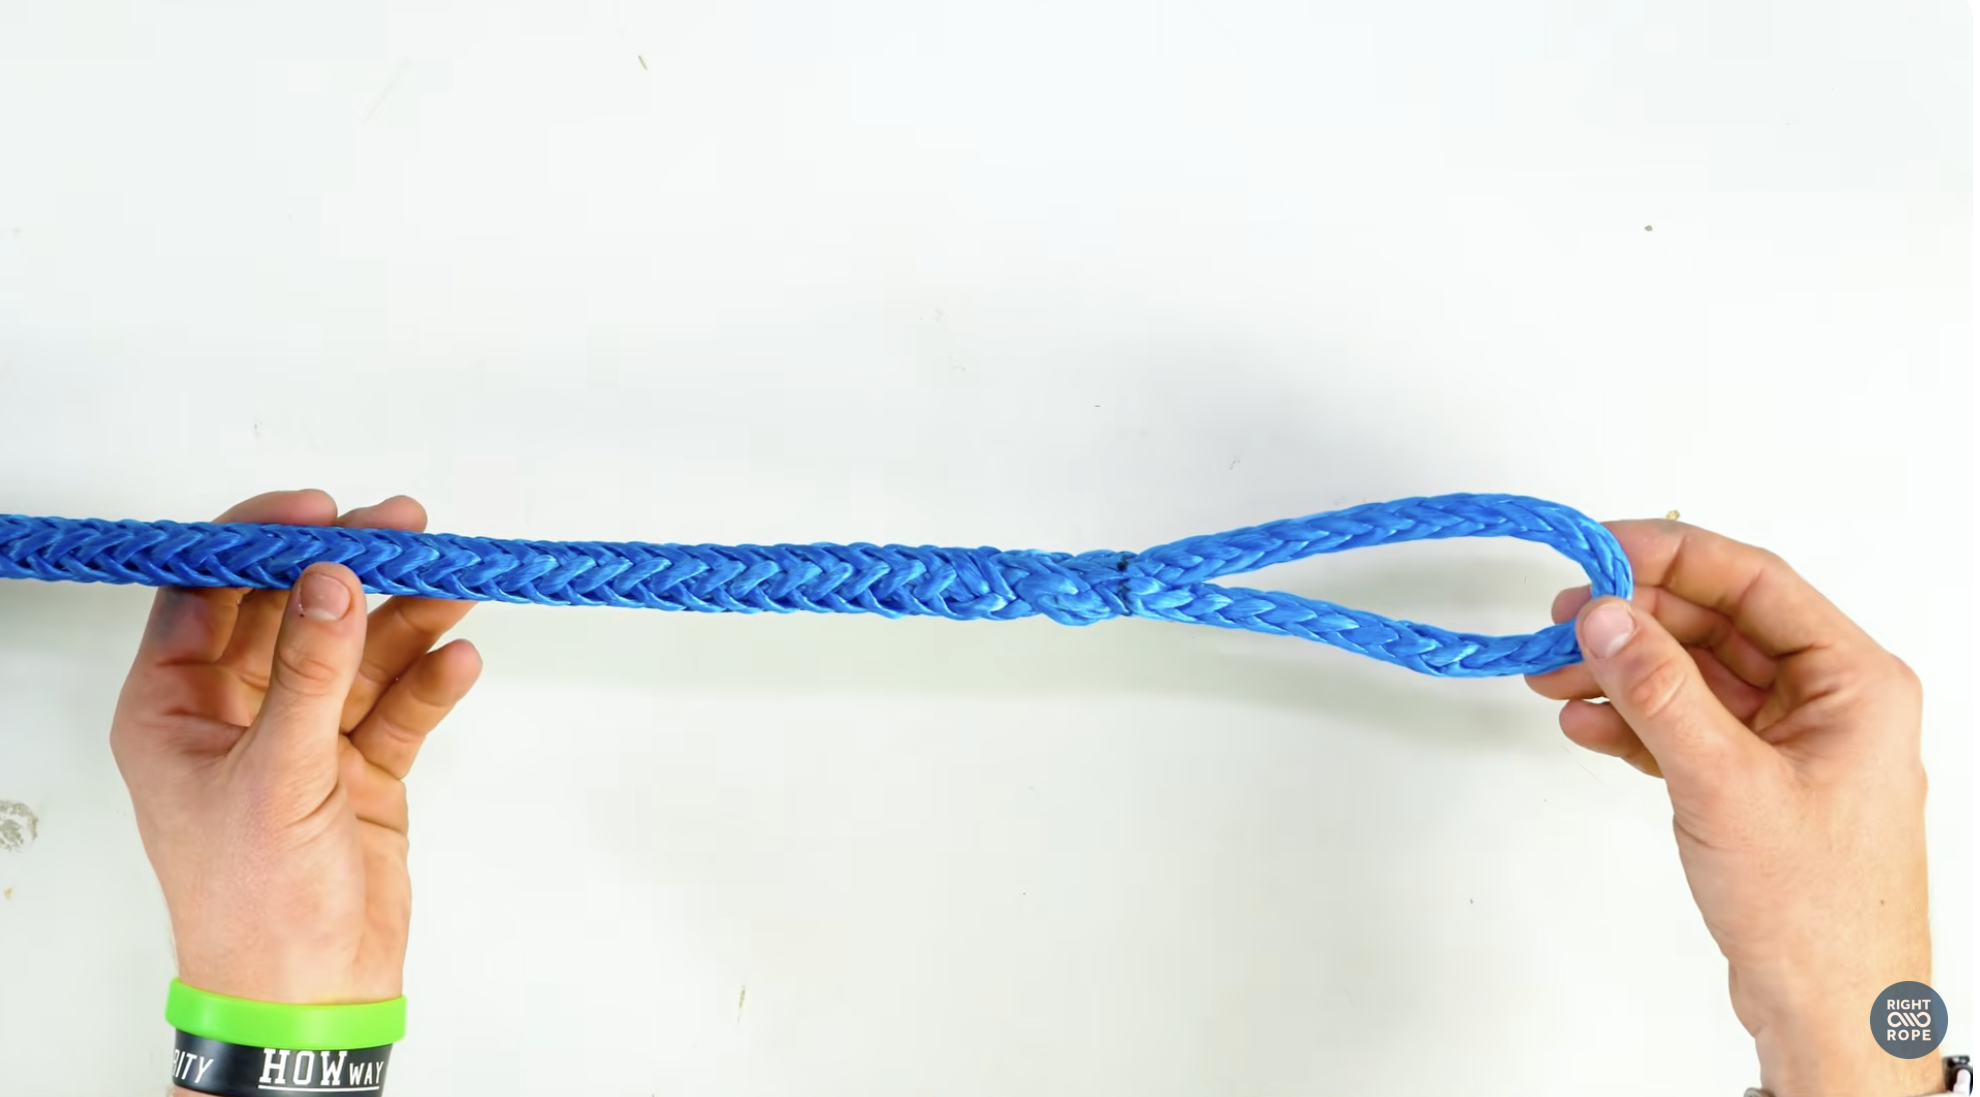
Straighten the eye, arrange the strands around the lock, and give the finished splice a good inspection. That is your completed 12-strand locking Brummel eye splice.
Can You Splice 12-Strand Rope Yourself?
Absolutely, as long as you have a spliceable rope and the right instructions for it. In some ways, a 12-strand locking Brummel is easier to understand than a double braid eye splice because you are only dealing with one hollow braid instead of a separate core and cover.
The part that tends to confuse beginners is forming the actual lock. Passing the tail through Mark 2 is easy enough. Passing the whole eye through Mark 1 can feel wrong the first time.
Watch the strand orientation closely, keep six strands on either side of your openings, and do not force the fid straight through strands that should not be split. Once the Brummel locks into position, the rest of the process is mostly a matter of making a clean bury and taper.
As always, practice on a spare piece first if the finished line is going into an important application.
For critical lifting, recovery, towing, life-safety, overhead work, or other high-consequence uses, the splice is part of the entire load-bearing system. Rope strength alone does not determine what the finished assembly can safely handle. Use the proper rope, hardware, splice specifications, safety factor, and inspection procedures for the job.
Get Your 12-Strand HMPE Rope Spliced and Ready To Work
Learning how to make a locking Brummel eye splice is a useful skill, particularly if you regularly work with synthetic winch lines, HMPE rope, pulling rope, rigging, or 12-strand hollow braid. Once you understand the basic sequence, it makes sense.
Mark the rope, pass the tail through the braid, pass the eye back through to create the lock, remove the twist, bury the tail, taper it, and milk everything into place.
The finished result is simple, compact, and clean.
If you want to do it yourself, grab your fid and follow along with this blog or our video. If you just need a piece of HMPE rope with a dependable eye on the end so you can get back to work, order it from RightRope.com and let us splice it for you.
Either way, start with the right rope for the job.
Next up in our Ultimate Guide to Splicing, we will move back to three-strand rope and show you how to make a rope-to-chain splice, one of the most useful splices to know when building an anchor rode.